Monday, April 24, 2017

What Miracles Taste Like ♥

Did you know that a herd of unicorns is called a *Miracle*?
This blog entry is dedicated to what I think *miracles* should taste like.

If you didn't already know this...
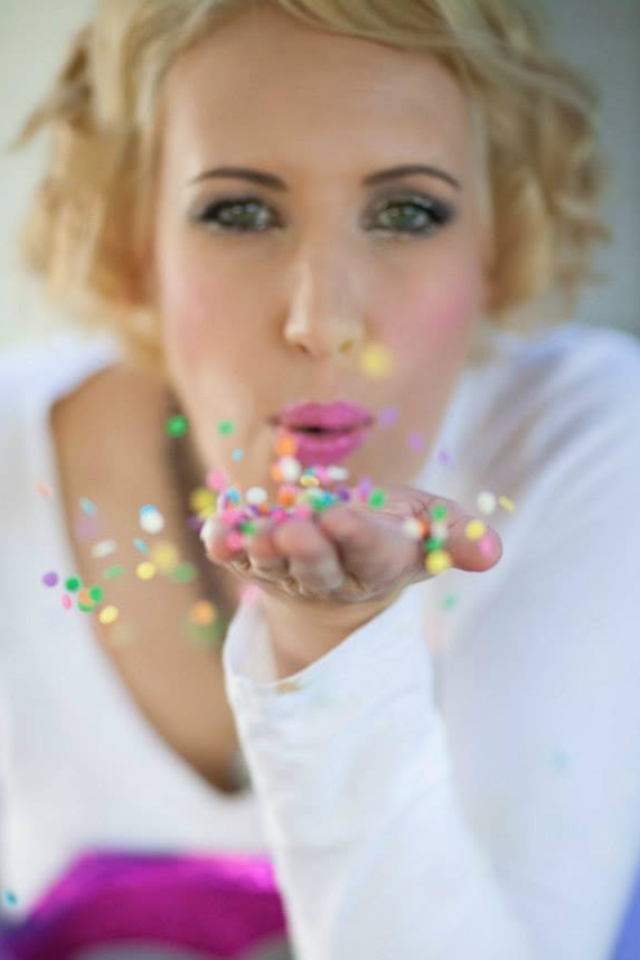
I've been this crazy unicorn loving tutu wearing woman for years now. 


So, of course when I saw that Starbucks came out with a Unicorn Frappe this last week, I may have been the only person who was sad seeing articles about it! ...Because more than drinking the drink..I would have loved to be a part of that product development team! After all, I have years of expertise in the tasting of glitter & unicorn rainbows. 

Starbucks...why didn't you call me?
I am pretty sure that I would have suggested the unicorn frappe taste a little something like this though:
Cotton Candy ♥ (my cupcake recipe/tutorial for these here)

Fantasy vanilla rainbow with a hint of glitter almond ♥ (my cupcake recipe/tutorial for these here)

My Blue Moon Ice Cream Cupcakes ♥ 

My White Chocolate Unicorn Bark
....Swirled with Rainbows, bedazzled with Sprinkles & Sixlets!
See the video on how I made it on Fox 11 Living with Amy here!


Make your own little edible *miracles*:
White chocolate candy melts (12 oz bag)
Hot pink candy melts (12 oz bag)
Yellow candy melts (12 oz bag)
Purple candy melts (12 oz bag)
Sky blue candy melts (12 oz bag)
Cookie sheet lined with parchment paper
5 medium sized microwaveable bowls

Have prepared in small bowls on the side:
-Confetti sprinkles
-Bugles (for unicorn horns)
-Silver dragees
-Edible glitter
-Edible sixlet pearls

Directions:
Bowl 1: Fill with white chocolate candy melts
Bowl 2: Fill with hot pink candy melts
Bowl 3: Fill with yellow candy melts
Bowl 4: Fill with purple candy melts
Bowl 5: Fill with sky blue candy melts


1. Microwave each bowl separately in 30 second increments until candy melts are smooth and melted.

2. Pour white chocolate candy melts onto the parchment paper lined pan, smoothing it out with a spatula until it is about 1/4-1/2” thick. 

3. Immediately start to pour each color of melted candy melts onto top of the white chocolate in little colored blobs.

4. Using a toothpick or a lollipop stick, create a swirling pattern of all the colors. Do not over mix or the colors will turn brown. I know it is fun to swirl, but the less you swirl the colors together, the better “swirly rainbow unicorn” look you will get.

5. Immediately sprinkle the confetti sprinkles, bugles, silver dragees, sixlets and edible glitter on top of your artistic creation. (Don’t wait too long or the unicorn bark will harden quickly and the sprinkles will not stick). 

6. Put your unicorn bark in the fridge & let it cool/harden for 15 minutes. After it hardens, break up into little pieces and enjoy filling your tummy with rainbows & joy!

What the unicorn bark looks like before you break it up!
Sweet with a little bit of crunch.
It's a miracle!


♥♥♥


I wonder what's next after Starbucks' Unicorn Frappe...
Chocolate Emoji Poo Frappes?! ♥
.....Recipe for this guy coming up on my next blog entry!

Labels: , , , , , , , , , , , , , , , ,

Friday, December 12, 2014

How to throw a Cupcake Party fit for a Snow Queen ♥

People always ask me...
"Why do you share your baking tips with others?"
Because I love to teach, and I believe everyone has their own style when it comes to baking and decorating cupcakes.  Every cupcake is an original.  I haven't always been a Cupcake Queen. I was a Cupcake Student at one time too! Some of my favorite online bakers that I learned the most from are I am Baker and Bakerella.  Because I've learned from others, I pass on the knowledge. Pay it forward ♥


This early winter, I taught two cupcake classes at the Royal Palace, Givens Farm in Hortonville, Wisconsin ♥ The theme:  By popular request..Disney's movie "Frozen".  The ambiance was perfect.  Glittery snowflakes were falling both nights I taught classes.

I even wore glittery eye make up and a braid to look like Snow Queen Elsa.


Have you seen the movie yet? I enjoyed watching Frozen because while it channeled my love for classic Disney Princess nostalgia for the first time in a long time (think Sleeping Beauty, Snow White), Frozen empowered Disney princesses in a very different way than any other Disney princess movie has!  
Plus..there is this snowman named Olaf who makes the movie worth watching.  Snow Queen Elsa creates him with her snow queen magic.  It is the first time since Frosty the Snowman that I have wished for a snowman as a best friend.  Olaf is the kind of fun snowman friend that would take a sunny tropical vacation with you. You have to watch the movie to understand!
 I shared some of my Cupcake Queen magic with the class, and we all created our own Olafs.  His huge smile made all of us smile.

His nose was made out of Cheddar Bugles.  They look just like carrots!  Using a clean pair of scissors, we cut them down to fit the size of his sweet cupcake face.

On a pan lined with parchment paper, we poured melted chocolate candy melts into a disposable piping bag or ziploc bag and cut a tiny hole at the end of each baggy.  We piped out the little "branches" for the top of his head onto the parchment paper.  We used the same technique to make the big smiles. While the chocolate "smiles" were still wet on the parchment paper, I centered a piece of Trident gum on each chocolate smile for Olaf's tooth.  Candy melts dry really fast, but I like to "set" all of my pieces in the refrigerator when I am done piping because all the little pieces of handiwork are very fragile and they tend to break if too warm.  The colder the little chocolate pieces are before you handle them, the harder they are and the less likely they are to break apart or melt.

Since I am super detail oriented, I piped Olaf's famous eyebrows on his little edible sugar eyes using the melted dark chocolate candy melts (you can find the sugar eyes at local cake decorating stores).   
Look at how many Olafs I had in the kitchen with me when I was practicing for my class!   Every Olaf will look different, but I think that's what makes your hand-crafted Olaf cupcake charming.


When throwing cupcake party classes, I love using these little painters palettes to put the sprinkles and edible gems in!  You can place your cupcake in the center of the palette as the centerpiece. Some of my favorite sprinkles for a Frozen Cupcake class:  Mini Snowflake Sprinkles, Edible Pearls, Chocolate Covered Blueberries, Disco Dust, Hot Pink Nonpareils, and Lavender Sixlets that look like giant pearls.


As a class we made handmade "Frozen" hearts and princess names by piping them freehand onto parchment paper.  (Hint:  If you're not great at freehanding, you can find any shape clipart you desire on the internet.  Parchment paper works awesome as tracing paper.  You just print the clip art out on a piece of paper, place under the parchment paper, and trace over the art onto the parchment paper with your candy melts).

Elsa, Anna, and Olaf. 


Remember those princess dress cakes from your childhood?  We recreated those princess dress cakes as cupcakes!  ♥  All you have to do is find your favorite picture of your favorite princess..and glue the paper doll to a toothpick.  Once you have frosted your cupcake to look like a puffy ruffly princess skirt, you can insert the paper doll.


The perfect flavor for a Frozen themed cupcake class?
 Blueberry Velvet cupcakes.
Rich, Royal and "Iced" for a Snow Queen.
Recipe for Blueberry Velvet Cupcakes here.
Recipe for Fantasy Rainbow Frosting Swirls and Buttercream Frosting here.

The lavender colored cupcakes remind me of Anna more than Elsa. I used a dot of Americolor Regal Purple Color Gel Paste in white buttercream to achieve this color!

I love using oversized chocolate covered blueberries on top of the cupcakes. Edible gems!

Student Art! Pretty amazing!


Last but not least....
(She who leaves a trail of glitter is never forgotten)...
Each student received a capsule of non-edible glitter as a gift (and a warm hug) from me!  At the end of class, we each opened a capsule of glitter and threw a fistful of glitter into the wind/snow.  If that won't make you feel like a Snow Queen, I don't know what will.  I told the students to feel free to make a wish as they were throwing the glitter.  (I found the glitter in cute little capsules like this at the dollar store-nail art actually, but perfect for this occasion).


Labels: , , , , , , , , , , , , ,

Monday, March 31, 2014

For the ones that Love Cadbury Eggs. Cadbury Egg Inspired Cupcakes ♥

There are many different kinds of people (or should I say..Peeps?!) in the world.  Those who like Peeps. Those who don't like Peeps. Those who think Peeps are adorable and colorful (meeee!!!). Those who like to watch Peeps blow up in the microwave (sometimes I've been guilty. Uh oh). Those who toast their Peeps. Those who like stale Peeps. And those who play with Peeps (again..meeeee!!!!):
Peep Surfing in my bowl of buttercream frosting. Rad. ♥ This happened in my kitchen one night.


Then there are the controversial Cadbury Eggs.   There are the "peeps" who love them. And they gasp in delight when they see them on the shelf.  Or those who think they are awful. Those who don't see what the big deal is and just don't care. And those who use Cadbury Eggs as a medium to create amazing things that can be described in many delicious terms:

Aww. The Peeps are even wearing edible Sixlet Pearls.
A couple of years ago, I baked a cadbury egg inside of these cupcakes.  I was surprised to see that they were featured here on HLN, as one of the Six Amazing/Awful Things To Make With Cadbury Eggs. I was honored. I felt that the word Amazing cancelled out the word Awful. ♥ I am an optimist. Can you tell?!  I guess the "awful" or "amazing" depends on what kind of person you are (see my descriptions above at the top of this blog to find your Peep/Cadbury Egg disposition).


For this Easter, I thought..
Instead of baking a giant Cadbury Egg inside of a cupcake..what if I partnered my chocolate cupcake with the deliciously controversial Cadbury Egg filling? So I stopped asking, and made my fantasy (maybe yours too) a reality!

 A chocolate cupcake.
Filled with a Cadbury Egg filling.
Swirled with layers of Marshmallow Cream buttercream frosting .
A mini Cadbury Egg on top of the yellow frosting "yolk.".
Some have little Peeps carrying the eggs on their backs!

How to make the filling:
You will need:
1/2 Cup Heavy Whipping Cream
1/4 Cup Butter (very soft but not melted)
1/2 Cup Corn Syrup
1 tsp Vanilla
4-5 Cups Powdered Sugar
Dash Salt
Electric Yellow Gel Paste Food Coloring
Finished Chocolate Cupcakes (see my easy bake-at-home doctored up mix recipe below)

...2 bowls, and 2 piping bags!

Mix up all the ingredients except for powdered sugar in your mixer until creamy.  Typical Cadbury Egg filling doesn't use Heavy Whipping Cream-but the cupcake version does! (It is a much better texture in your mouth in combo with a cupcake).  Now add the powdered sugar gradually until your filling starts to create little "peaks".  You can add or decrease amount of powdered sugar depending on how thick you want the filling to be. If you add more powdered sugar you can actually turn this into a moldable edible clay like fondant!  If you add too much powdered sugar you can always go backwards by adding little bits of Heavy Whipping Cream here and there to thin it out.


Once you reach your desired consistency, divide filling into 2 bowls.  Color one bowl of filling Electric Yellow (I use Americolor Gel Paste), and leave one bowl white! Fill 1 disposable piping bag with yellow. Fill another disposable piping bag with white and set aside until you are ready to fill the cupcakes.  After you have baked your cupcakes, carve a hole out of the middle of your cupcakes with a cupcake corer.  Now you can cut a hole at the end of your piping bags, and alternate the addition of the yellow and white fillings to the inside of your cupcake.

This is what it will look like, yay! Looks just like the inside of a Cadbury Egg.


Now you can decorate the top of each cupcake however you'd like
.
I do the same thing with the frosting that I did with the filling-half of my buttercream frosting is colored yellow with Americolor Electric Yellow Gel Paste, and half is left white. I fill one piping bag with yellow frosting, and one with white. I cut a large hole at the end of each one..and pipe onto my cupcakes,  stacking a yellow frosting "egg yolk" on top of each cupcake!
Then I adorn each cupcake with delight! Peeps swimming through frosting (see the video for how to do that here), Mini Cadbury Eggs, Edible Glitter, Sixlet Pearls!

I wrap up how it is done (even blowing sprinkles at the end)!

Recipe for Marshmallow Cream Frosting:

13 oz Marshmallow Cream
1 lb butter (softened)
2 teaspoons vanilla extract
6-8 Cups Powdered Sugar
♥Combine all ingredients except for powdered sugar in stand mixer and whip until creamy.  Gradually add powdered sugar until frosting is a thick enough texture to hold shape when piping. If you want a creamier frosting, use less powdered sugar.


Easy Bake At Home Chocolate Cupcakes (tastes a lot like my signature cupcakes I make from scratch for the Cupcake Mansion):
1 box of Devils Food Cake Mix
1/2 Cup Instant Chocolate Pudding
1 1/4 Cup Hot Water or Hot Coffee
4 Eggs
1/3 Cup Oil
♥Preheat oven to 325 and line cupcake pans with cupcake wrappers.  Combine all ingredients in stand mixer and whisk together until evenly blended (about 2 minutes).  Make sure to scrape the bowl down in between mixing to incorporate all the ingredients.  Fill cupcake wrappers 3/4 full and bake at 325 for appx 22 minutes or until toothpick inserted comes out clean.

Next week's recipe:

How to make Rainbow Cotton Candy Cupcakes!

Labels: , , , , , , , , , , ,

Monday, April 2, 2012

More Than An Average Peep Cupcake♥

I think I am going to have to hostess a Peeps Cupcake Hunt for all the children in the neighborhood ---- Instead of an Easter Egg Hunt.
I dreamt up these Peeps cupcakes that look like they are all going to march together in the nearest Easter parade. 

..or maybe they are going to march right into your Easter basket to surprise you on Easter Sunday!? ♥

Yes, they are adorable-but they were made to be eaten.
Sixlet Pearls that look like bubbles.
Confetti.
Marshmallow Fluff based frosting.
Glittery Tiffany Blue Candy Melts dripping off the cupcake.


I went so Peep crazy, I started topping my cupcakes with other marshmallow delights.
Like making flowers out of Marshmallows.
And Frosting out of Marshmallow Fluff.

Perhaps the best part of finding the cupcake is eating it.....and then discovering another surprise?!! Like this Cadbury egg I baked inside of a cupcake...

I wasn't even sure if it was going to work. It was another late night cupcake experiment.  This is what my Cadbury egg looked like inside of a cupcake liner before pouring more chocolate batter on top of it and baking at 350.

I really do try to make the world a better place through my baking.
A cadbury egg, a marshmallow peep, and a cupcake. ♥ Does this make your world a better place, if even for a yummy moment?
To make the peeps look like they are swimming in the frosting, all you have to do is (oh my, this sounds sad).. cut the peep head and tail off of the marshmallow body.  Then use the sticky chocolate ganache as your glue to hold the head and tail on.
Peeps are much happier swimming in cupcake swirls & sprinkles.

Labels: , , , , , , ,

<data:blog.pageTitle/>

This Page

has moved to a new address:

https://theamandacupcake.com

Sorry for the inconvenience…

Redirection provided by Blogger to WordPress Migration Service