Cotton Candy Cupcake Recipe!
.jpg)
Cotton Candy Cupcakes that look like...
Clouds! Like when you stare at the sky, and you make all these shapes out of clouds because you are wonderful at using your imagination. Or Clouds of Cotton Candy, so light and fluffy that you can't believe that they are real (because it does melt in your mouth and disappear after you eat it never to be seen again.).
I'm going to share my bake-at-home version of cotton candy cupcake recipe with you kiddos today (and yes I said kiddos because you are all kids at heart)!
Decor:

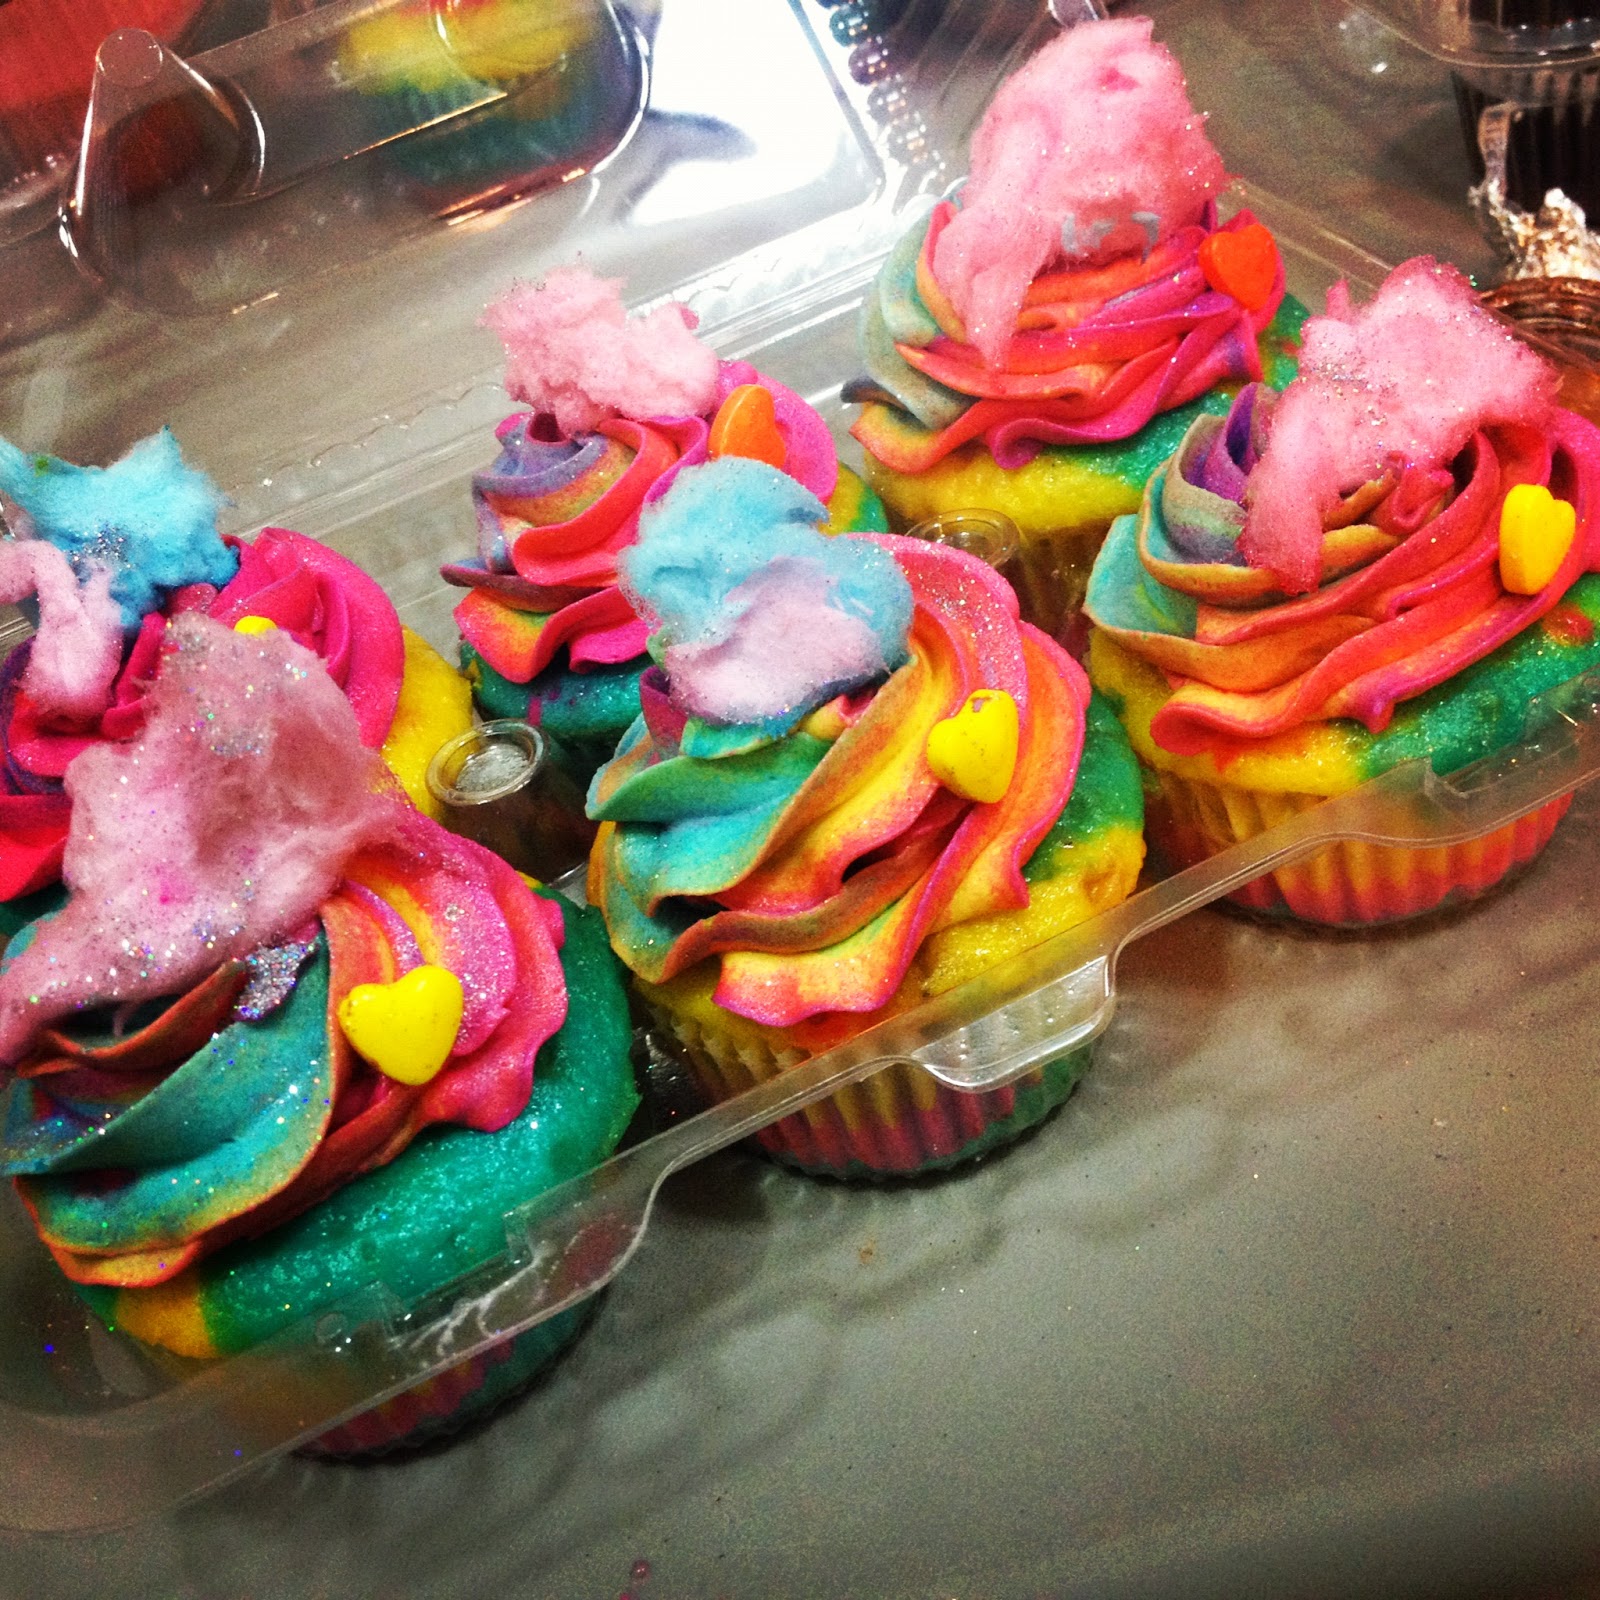
I use a Wilton 4B Tip inserted into the end of a disposable piping bag to create the Cotton Candy Dreamy Puffy Fantasy Cloud like swirl effect on top of my cupcake.

I insert the tip into the end of a disposable piping bag,cut off the end and pipe little multi-color swirls of frosting all over the top of my cupcake. The best colors to use as a rainbow cotton candy swirl are a dot of Americolor Sky Blue (for a pastel cotton candy blue color), a dot or two of Americolor Electric Pink, and a dot of Americolor Royal Purple. Think light and fluffy for your colors. You only need 3 base colors because the colors will mix together once they are in your piping bag and create other light and fluffy colors! To learn how to create the rainbow frosting swirl effect, you can read my Vanilla Rainbow Cupcake blog tutorial here: Fantasy Vanilla Almond Rainbow Cupcakes!

The actual inside of the cupcake is a rainbow too. And I baked little shreds of cotton candy inside the cupcake. When you bake these, your kitchen will smell so nostalgic. I wish I could take this scent with me everywhere. I piped little colors on top of each other inside of the rainbow cupcake using 3 different disposable piping bags full of different colors.

I always change up the color combos, this one was kind of fun too.
Using Americolor gel pastes, Teal, Fuschia, and Royal Purple♥
(Scratch N Sniff. Just kidding, I wish I could somehow make this happen)!

The number one reason I do these little swirly swirls of cotton candy inspired frosting on top of my cupcakes instead of putting real cotton candy on top...
Which I've also done before and looks amazing at first..

(so pretty, right?!)
Is because.. the cotton candy eventually reacts with the frosting and dissolves into a liquidy sticky mess on top of your cupcake and you'd never know that it once was cotton candy! However..if you are going to serve your cotton candy cupcakes to be eaten right away, it does looks super pretty when you "float" a piece of cotton candy like a cloud on top of each cupcake.
If you want the clouds to stay puffy for extended periods of fun, I'd recommend my fluffy cotton candy cloud frosting technique!
Using Americolor gel pastes, Teal, Fuschia, and Royal Purple♥
(Scratch N Sniff. Just kidding, I wish I could somehow make this happen)!
The number one reason I do these little swirly swirls of cotton candy inspired frosting on top of my cupcakes instead of putting real cotton candy on top...
Which I've also done before and looks amazing at first..
(so pretty, right?!)
Is because.. the cotton candy eventually reacts with the frosting and dissolves into a liquidy sticky mess on top of your cupcake and you'd never know that it once was cotton candy! However..if you are going to serve your cotton candy cupcakes to be eaten right away, it does looks super pretty when you "float" a piece of cotton candy like a cloud on top of each cupcake.
If you want the clouds to stay puffy for extended periods of fun, I'd recommend my fluffy cotton candy cloud frosting technique!

You aren't limited to only making your cotton candy cupcakes look like cotton candy though! Think of what cotton candy swirls look like in your own imagination. I came up with purple poodles!

Or Lorax tree cake pops. (Truffula cake pops). These were made by dipping a cotton candy rainbow cake pop into candy melts of truffula-esque candy melt colors. Then I took a toothpick and added more candy melt to the outside of the pop, swirling and adding tons o fun texture to the pop. These look like Cotton Candy too!

You are a cupcake superhero. I believe it.
So here is the recipe.
Pour yourself an epic glitterized superhero coffee, and go for it.
So here is the recipe.
Pour yourself an epic glitterized superhero coffee, and go for it.
COTTON CANDY RAINBOW CUPCAKES
Ingredients: (Makes appx 18 Cupcakes)
1 Box of White Cake Mix
1/3 Cup of Vegetable Oil
1 ¼ Cup Buttermilk (instead of water)
4 Eggs
1 Tsp Cotton Candy Liquid “Extract” (found at local cake supply stores) and/or one packet of blue Duncan Hines Cotton Candy Frosting Flavor
1 small (3 or 4 oz) box of White Chocolate Pudding, Dry in Powder Form
Cotton Candy, ready to tear up into small pieces & bake inside of cupcake.
For Colored Rainbow Batter:
♥Electric Pink Gel Paste Color (I use the brand Americolor in the squeeze bottles)
♥Royal Purple or Electric Purple Gel Paste Colo♥Sky Blue Gel Paste Color (with this color, optional—Blue Cotton Candy
For piping the rainbow batter inside cupcake liners: 3 Disposable Decorating Bags
Directions:
1. Preheat the oven to 325.
2. Line cupcake tins with cupcake papers.
3. Blend all ingredients (except colors) together for about 2 minutes in your mixer.
4. Take out 3 separate bowls and pour about 1 1/2 Cups of white batter in each bowl.
5. Squeeze three drops of the Electric Pink color into one of the bowls.
6. Squeeze three drops of the Purple color into one of the bowls.
7. Squeeze three drops of the Sky Blue color into one of the bowls. Optional: Add half a 0.10 oz packet of blue Cotton Candy flavor mix to this color batter during this step. This will give your cupcake a boost of cotton candy flavor.
8. Fill one disposable decorating bag with Electric Pink Batter and cut a small hole at the end for piping.
9. Fill a second disposable decorating bag with your Purple batter and cut a small hole at the end for piping.
10. Fill a third disposable decorating bag with your Sky Blue Batter and cut a small hole at the end for piping.
11. Cover the bottom of your cupcake liner with a small amount of pink cupcake batter, using your piping bag to pipe the batter out neatly.
12. Tear a piece of cotton candy off and place on top of pink batter, this will bake inside the cupcake and give your cupcake flavor.
13. Repeat by piping purple batter on top of cotton candy & pink batter.
14. Repeat by piping sky blue batter on top of your purple batter.
15. Continue to repeat alternating between rainbow color batter until your cupcake liner is about ½ full.
16. Bake at 325 for about 20-25 minutes or until inserted toothpick comes out clean.
17. Let cool before decorating, but if the temptation strikes-cut into the cupcake! A beautiful rainbow cotton candy surprise inside of the cupcake!
COTTON CANDY FROSTING:
Ingredients: (Frosts appx 18-20 Cupcakes)
7 oz Marshmallow Cream at room temperature.
2 Cups Unsalted Butter, softened but not melted.
3 Teaspoons liquid Cotton Candy “Extract” (found at local cake decorating supply stores)
and/or Duncan Hines Cotton Candy Frosting Flavor
6-8 Cups Powdered Sugar
For Decorating:
Piping Bags & French Pastry Tip.
Optional: Cotton Candy & Hologram Silver Disco Dust
Colors needed to make your frosting look like puffy cotton candy peaks on top of cupcake:Electric Pink Color Gel
Sky Blue Color Gel(add one whole 0.10 oz packet of Blue Cotton Candy Frosting Flavor Mix to this color).
Plain White Frosting
Instructions:
1. In stand mixer using flat beater attachment, whip Marshmallow Cream & Unsalted Butter until creamy.
Plain White Frosting
Instructions:
1. In stand mixer using flat beater attachment, whip Marshmallow Cream & Unsalted Butter until creamy.
2. Add Cotton Candy Flavoring to Butter & Marshmallow Cream base.
3. Gradually add Powdered Sugar until you reach desired frosting thickness (less for creamier frosting, more powdered sugar for stiffer frosting—better for piping ).
4. Separate Frosting into 3 bowls, just like you did with the cupcake batter. In one bowl, add 2-3 drops of electric pink. Repeat in 2nd bowl with Sky Blue but make sure you add one whole .10 oz packet of Blue Cotton Candy Frosting Flavor Mix to this color. Add already made white frosting to 3rd bowl. If you want colors to be brighter-add more color per bowl. This is up to you! You don't need purple color here because pink, sky blue & white will eventually pipe out a purple color as you decorate.
5. To pipe a rainbow colored “cotton candy” inspired peak on top of cupcake: Cut opening at the end point of disposable piping bag and slide French pastry tip down through the hole.
6. Stack each color of frosting on top of each other inside of the piping bag. (Pink, Sky Blue, White).7. Pipe little peaks as shown in picture to resemble Cotton Candy Peaks!8. Optional: Tear off pieces of cotton candy and set on top of frosting swirls. Serve immediately if decorating with real cotton candy, since cottoncandy will wilt into the frosting.
Labels: Amanda Cupcake, blue cupcakes, cotton candy, cotton candy cupcakes, cupcake tutorials, dreamy cupcakes, frosting tutorials, lorax cake pops, pink cupcakes, poodle cupcakes
posted by Amanda Cupcake @ 7:26 AM
2 Comments
![]()
![]()


2 Comments:
LOVE your beautiful and creative creations... keep them coming!!!
cool
Post a Comment
Subscribe to Post Comments [Atom]
<< Home