Saturday, March 4, 2017

Baby Cupcake!

SURPRISE! I'm having a little cupcake.

My Mister Cupcake and I had a magical enchanted fairytale wedding (see my previous blog here). The wedding day was so magical in fact, that we conceived our first baby on our wedding night!

..And it's a girl.
Since I love all things glitter and I still have plans for the revamping of my cupcake brand, I am super excited that my first baby will be a girl. She can follow me and my sparkly glitter filled trail of adventures. (Which include baking and making people happy and many other things!)

Now maybe I'll have someone to wear tutus and throw fantastical joint birthday parties with. (She is due on my birthday, June 12th!!!!)
Here she is. At 21 weeks ♥
She has my cheekbones.
Looks like she has her dad's hair!
Isn't it amazing what they can do with ultrasound pictures?

.
...And wow, does she move around in my belly a lot!
She is photogenic & loves pop music, sweets, milk, potatoes, and orange juice.
I am thinking she'll be a big fan of dancing?! No matter what she wants to be..I want to be the best example to her that she can do anything she dreams of. The sky is the limit. 


Here I am at 25 weeks, baby cupcake is growing quickly now. (This picture was taken this week!)


Since my pregnancy is considered "geriatric" now that I am over 35 (sigh that word, geriatric, though), Kyrik and I found out the gender very early (around 9 weeks). A DNA test revealed she was a very healthy baby, no genetic problems. .....And it also revealed her gender!


...On a very snowy day in December we  threw a mini gender reveal party for several of our closest friends & family. Mister Cupcake & I already knew the gender. But our families and close friends did not.It was really fun to surprise them!

I made this cake (with a very gender reveal appropriate pun as the message):

When we cut the cake open....

it exploded with shiny girly pink glitter!

Our closest friends and family signed this adorable onesie ♥
We are going to frame it and hang it in the nursery.
(buy it on Etsy from BugnBun's shop!)

We served unicorn Fur! (Cotton Candy)
My little niece and nephew truly believed this was unicorn fur. I might tell my little girl that there was magical unicorn fur at one of her very first celebratory parties!

......After all, wouldn't unicorn fur taste like cotton candy?
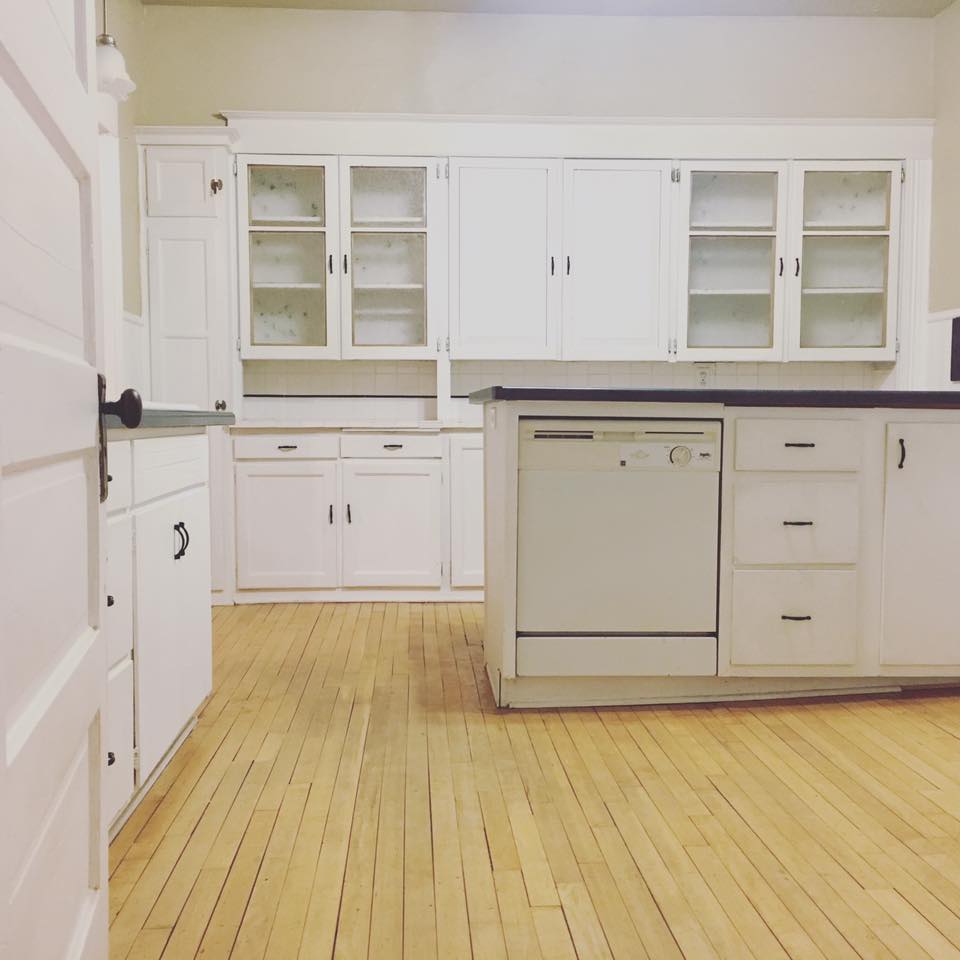

Since we are going to be a bigger family, we also bought our first new home. We officially closed at the end of January. This is our kitchen.
I am going to bake my heart into art here.

Labels: , , , , , , , , , , , , ,

Wednesday, June 24, 2015

America's Birthday Cake!


Today I woke up at 2am, and drove (very carefully) under the stars, so that I could celebrate America's birthday early with all of Madison, Wisconsin at WKOW 27 with this American Flag cake and cupcakes!

An American flag inside of a cake! That in and of itself is a celebration that you can eat!
Typically, I decorate the outside of everything with crazy swirls, colors, and sprinkles.  It was challenging for me to keep the whipped cream frosting on the outside simple and plain. But this time, it was time for the cake that was hiding to shine (or sparkle like a firework?)!

This is how I constructed an American flag inside of a cake (and it is easier than you think, you just have to think inside out):
  • I mixed enough of my favorite white cake batter to make seven 7 round 8" layers of cake.
  • 3 of my layers were Americolor Gel Paste Super Red.
  • 3 of my layers were White.
  • 1 of my layers was Americolor Gel Paste Electric Blue.
  • After the cakes baked and cooled, I cut the red and white layers in half. After I cut them in half, they were about 3/4" tall.  
  • I did not cut the blue layer in half.  I trimmed any excess cake off of the top of the blue cake so that it was level, but still thicker than the rest of the cake layers.
  • Using a 4" round template made out of card stock, I cut a hole out of the center of 1 white layer and 1 red layer. At this point, I was done with these layers-they didn't go anywhere else on my cake.   I may or may not have eaten some pieces of them! I did keep the red & white rounds and set them aside for later. These are important for creating the final masterpiece.
  • Using my 4" round template, I cut another hole out of the center of the blue cake.  
  • I stacked each layer on top of each other in this order (applying thin layers of frosting to the top of each layer as I built the flag cake): Red, White, Red, White, Blue.
  • As soon as my cake was stacked, I lightly frosted the 4" red & white cake rounds I cut out earlier. I filled the hole in the blue cake with the circles.  First with the red layer. Second with the white layer.  
  • I used a simple whipped frosting to decorate the outside of the cake, and topped the cake with sparkly stars and a glitzy Uncle Sam hat.
When I cut open the cake, my breath was taken away.It was beautiful.
But there was something missing. Glitter and sprinkles. So I added mini white stars by hand.
Then I got to thinking, next time I make this cake I may just add the mini white star sprinkles to the batter!

'Merica is the home of the free...and the delicious.

Leftover batter was used to make matching cupcakes!

Do you see the mason jars with cupcakes inside of them and firework cupcake toppers?
I used the leftover cake trimmings to make little mason jar parfaits!
Those would be a hit at a picnic for the 4th of July.
Happy Birthday, America!!!!!!

(I always find an Ellen cutout whenever I go to the TV studio and take a picture. It's tradition. She is one of the people that has inspired me to become Amanda Cupcake!)


Labels: , , , , , , , , ,

Monday, May 4, 2015

Pinata Cake & Cupcakes

If you know me really well, you probably know that I get intimidated by making cakes.
I work day in and day out with little cupcakes most of the time. Super cute, mini little, transportable treats with dollops and swirls and fluffs of frosting on top that you can play with like play-dough. ♥  Cakes are intimidating to me because I feel like I have to add an architect/engineer hat to my artist brain.  I have to create a foundation so that the cake won't slide or fall apart. I am way better at creating textured, fancy flouncy frosting swirls on top of adorable little cupcakes than spreading on a perfect sheen of frosting to cake that is so polished it looks like fondant ♥

However...there can be exceptions made.....
When there are pinata cakes involved!!!!!!
A Pinata cake doesn't have to be polished or neat.
It is exploding with fun and celebration from the inside out!
The best thing is that you can fill the cake with any candy or treat you desire.
(I even thought of making a Mountain Dew cake with Doritos coming out of it, maybe I'll do that in the future).


I made matching Pinata Cupcakes to complete a whole "set."
I divided shredded coconut into ziploc bags and added a dot of Americolor Gel Paste to each ziploc bag (colors used here are Electric Pink, Sky Blue, and Electric Yellow). I sealed each baggy shut and danced a little in my kitchen to shake the color into the coconut. I piped frosting onto each cupcake and sprinkled with colored coconut. I piped pretty big fat swirls on top so that the cupcakes would look bigger and more full, but you can put on as much frosting as you desire.


Each Pinata cupcake is filled with Sixlet Pearls as a "SURPRISE"!
And look at how the shredded coconut colors the frosting!
It reminds me of one of those mexican hoodies you can buy at farmers markets.
I use a measuring spoon to scoop a hole out of the center of the cupcake. I keep the cake I scooped out and put it to the side. I fill the hole with pastel Sixlet pearls and cover it again with the the leftover cake from my scooping.

How did I make the pinata cake?
Using my favorite cake recipe, I baked four 8" round layers of cake.
I used a 4" biscuit cutter to cut a hole into the center of 2 out of 4 of my cake layers.

  
Cake Assembly Order:  
A.  Place 1 uncut layer on a cake stand/turntable and spread your favorite frosting on top using a piping bag or a frosting knife.
B.  Top this layer with 1 layer that has the center hole removed. Spread frosting on top but not over or inside the hole.
C.  Top this layer with the other layer that has the center hole removed. Spread frosting on top but not over or inside the hole.
D.  You'll see a big hole in the center of your cake. Fill it with all kinds of goodies! I used Peanut Butter M&Ms, milk chocolate M&Ms, multi-colored gumballs, and chocolate coins in many colors! Can you imagine making a baby reveal cake like this too using pink or blue M&Ms and other colored candies?
E.  Place the final layer on top of the cake.  Using a large frosting knife and your favorite frosting (the more creamy & whipped the better), frost the outside of the cake!


You can even top the pinata cake with another mini sized pinata that is also filled with nummies.

Mind..blown!! ♥


I decorated my pinata cake all fancy schmancy.
Each layer was frosted with a different color before I stacked the cake layers on top of each other!

Just remember, the most fun part of the cake is the inside! Cut a BIG PIECE out of your cake using a large knife..or if you are feeling it, smash the cake.  Either way you'll find something you like, I'm sure of it. My favorite are the chocolate coins. What's yours?
♥♥♥

Labels: , , , , , , , , , ,

Tuesday, September 4, 2012

Someday..you will be old enough to start reading fairy tales again ♥

I went to my first Renaissance Fair last weekend.
And it was even better than the first time I went to Disneyland!
Dressing up in costume always brings me back to the fearless, real me ♥ The side of me who gets to be what she always dreamed of.  And this last weekend, it was a fairy princess! 
 
Which reminded me of an amazingly sweet princess who glitterized my heart this summer.
Princess Kianna. ♥
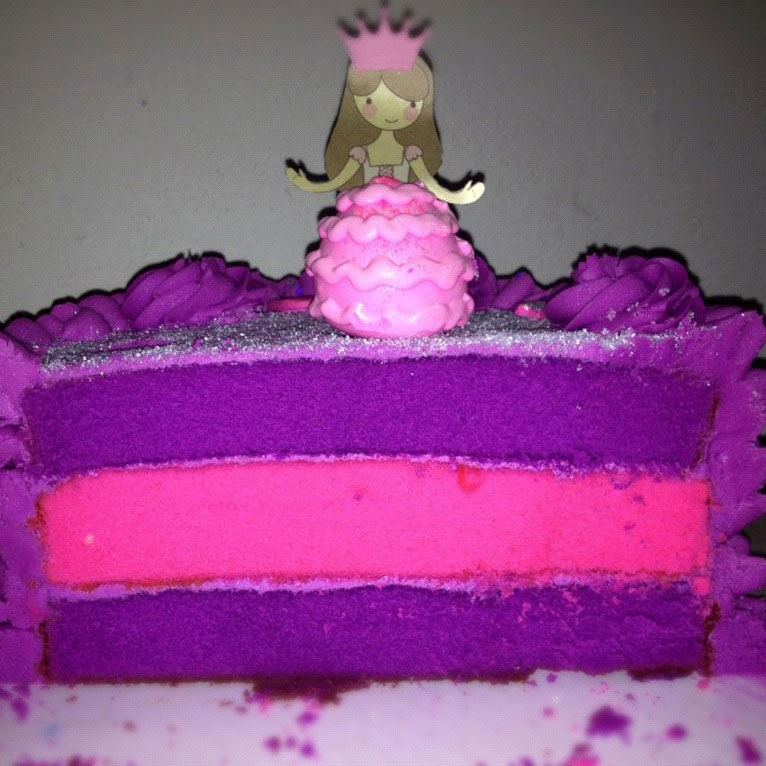
I tried my best to tell her fairy tale on a cake.
 
I agreed to meet with Kianna in person over a lunch date one day, and I asked her what she'd like on her cake.
 
Her request..
Magic Wands. ♥
 
Pink & Purple Cake Layers!
 
Sparkles, princesses, and crowns!
 
I added ruffles to the cake to match the birthday princess's purple tutu ♥.
 
..and made princess doll cake pops to match!
I printed the princess paper dolls from Activity Village, cut out the crowns separately and glued them to each princess paper doll. ♥
 
The princess skirts were the cake pops!  (I've made these before using Barbie as the icon, and you can click on the link here for the tutorial on how to make your own paper doll pops!)
 
The magic wands were birthday candles with a fondant star on top!  I used a star fondant cutter to cut out fondant stars.   My "fairy godmother" touch:  I warmed up candy melts in the microwave. The candy melts were my edible glue to turn a basic birthday candle..into a glittery starry magic wand!♥
 
How did I come up with all of this on one cake? It was imagination more than magic. I channeled my inner "supercalifragilisticexpialidocious".Most importantly, my inner Princess Kianna! 

....Because a princess Kianna exists in all of us, even when we are "all grown up."
 
 
♥Honored to be Kianna's fairy godmother for a day!
 
I couldn't resist, I saved the text her mom sent me.
Yes, princess Kianna, you have glitterized my heart! ♥
 
..or if you're around me..maybe eating them? ♥

Labels: , , , , , , , , , , , , , , ,

Friday, September 23, 2011

Amanda-Pie

You know how I always say I am trying to create some kind of world peace by uniting cupcakes with pie? Well, crazy little me decided to take on the pie-cake-pie-cake combo this week.
I am going to call it the Amanda-pie.

I was talking to my new friend Bryon a few weeks ago when he ordered the cake for his parents Birthday/ Anniversary celebration.  He was thinking....Maybe something Fall-Esque. Maybe something with Apples in it.


I had my mind made up.
I had to merge cake and apple pie together the way that I do cupcakes.
(See my cupcake-pie combo here).
As risky as I knew this adventure was ..
it worked!

A three tier cake:  
Tier 1: Vanilla Bean Cake with an Apple Pie Baked on The Inside.
Tier 2:  A Thin Spice Cake
Tier 3: Repeate Tier 1.


I was inspired by the "Cherpumple" Cake♥


The lovely couple celebrating.

The theme of the cake definitely had to be..
 Warm.
Like a Fall Romance.
Like this mini Spice Cupcake that I baked separately & used as a cake topper...
disguising itself as a caramel apple!


  Complete with Donna and Bill's name in lights.
Or Pretty Sparkly Banners that catch the light at least.. ♥
A Fall Celebration on a cake!
Maybe like visiting an Apple Orchard, Partying, and Eating Cake in one room..with all the people that love you?


Since I am Amanda Cupcake I had to add cupcakes.
Spiced Cupcakes that look like caramel apples with romantic pretzel sticks as the "craft stick."
I even hid little cinnamon apple pieces inside the miniature cupcakes.


The banner says it all.
Happy Birthday.
Happy Anniversary.
Fall is In the Air. ♥


And yes..don't forget.
There are apple pies inside of this cake!


These are all the apple slices that I peeled.

And the pies that I baked from scratch.
(Ok, my pie beautifying skills aren't quite as lovely as my cake making skills. But I am determined to master it!) But for now..the pies were *delicious* and were going to blend right into the cake beautifully.


With some salted caramel buttercream frosting.
I actually received a round of applause when the cake was cut!


It must have been the apron.


Or perhaps it was the Amanda-pie. ♥


Labels: , , , , , , , , , , , , ,

<data:blog.pageTitle/>

This Page

has moved to a new address:

https://theamandacupcake.com

Sorry for the inconvenience…

Redirection provided by Blogger to WordPress Migration Service