Tuesday, February 10, 2015

Eggless Sugar Cookie Dough, one of my BFFS.♥

Definition of a BFF in my world:  A cupcake's best friend.
Every cupcake needs a BFF in a world full of fluff.
Yesterday was one of those days for me.

Whenever you put yourself out there like I do, you will be paid in return with LOVE. But when you pour your heart and soul out to the public, sometimes you'll receive the opposite.  It is a risk you take, especially when you blog,  become a business owner, or voice your dreams, wishes, and opinions to the public.  This week I received a statement on my public blog saying that I don't care about my fans because I haven't been on my blog lately.   I won't go into details as to why I've been a bit behind, but I plan on doing some really wonderful things going forward.  ♥   I think their statement stuck out to me more than any other critique could have because I do everything one girl can to share my love of baking with you, I've dedicated the past 4 years of my entire life to do that and want to dedicate the rest of my life to doing amazing things to share the love of what I do with others. I recently told someone I wanted my cupcakes to change lives and I want to prove that it can be done!   I have a whole plan and I want you all here with me ♥ I've already shown that it can be done, little by little.  I've made cupcakes with Girl Scouts of America, the Make A Wish Foundation, the Sibling Network of Wisconsin, and delivered cupcakes to people with leukemia to cheer them up.

So I made a little sign dedicated to moving forward:
(Thanks to T-Swift for the inspiration)


And here's a long awaited recipe for you...
One of my favorites that I created out of an Amanda Cupcake BFF
(Sugar Cookie Dough):
\

 ♥
Eggless Sugar Cookie Dough, Recipe:
(You can roll this into balls, poke with sticks, and dip into chocolate and sprinkle with LOVE like I did above, scoop on top of cupcakes with an ice cream scoop like a big ball of frosting, or eat right out of a jar...or a bowl.. or off of a spoon. I could go on and on and on. It's amazing, really):

Ingredients:
1 Cup Butter (softened)
1 Tablespoon Pure Vanilla Extract
1 Cup Flour
1 Tablespoon Vanilla Malt Powder
1/2 tsp salt
2 Tablespoons Milk or Almond Milk
4-6 Cups Powdered Sugar

Cream the butter and milk together in a stand mixer, using flat beater attachment.  Gradually add remaining ingredients (except for the powdered sugar).  When ingredients are creamed together, gradually add powdered sugar until you reach desired sweetness or desired texture.  If you are rolling into balls to dip into chocolate or candy melts, you will want the texture to be sticky like play-dough.  If you are going to scoop on top of cupcakes, you want the texture to be just like sugar cookie dough (as pictured above).  If you are just going to eat it out of the bowl, add just enough powdered sugar so that the dough tastes sweet enough for you!

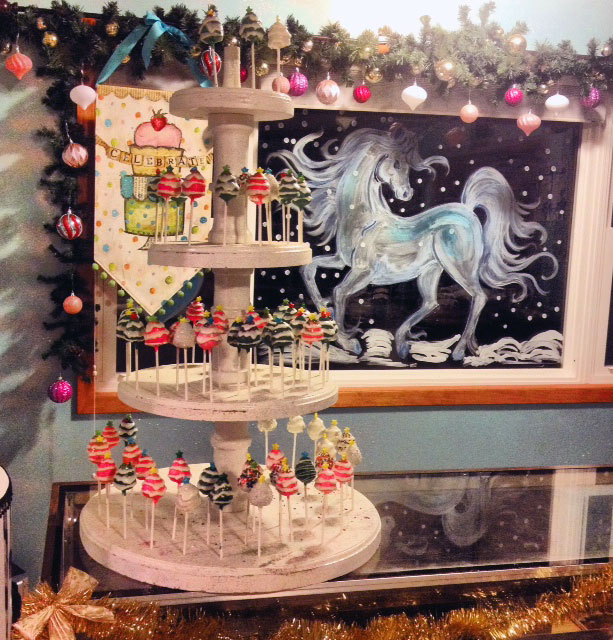
To make the cookie dough balls:
Roll the sugar cookie dough balls by hand:  Using your hands, roll into 1 – 1 1/2”  balls and set on parchment paper lined baking pan.  Refrigerate for appx 1 hour.  Refrigeration helps harden the cookie dough balls so that they are solid enough to coat with candy melts.

Melt candy melts.  In microwave proof bowl deep enough for dipping, melt candy melts, in 15-30 second increments in the microwave, stirring in between until melted and smooth.  Do not over microwave or candy melts will burn and harden.

"Glue" sticks into truffles using melted candy melts. (I enjoy using mini wooden popsicle sticks for the cookie dough pops).  
Dip the tip of each stick  into melted candy melts, and insert this end of the stick all the way to the bottom of each cookie dough ball. Repeat for all cookie dough pops and let the edible candy melt “glue” set for appx 5 minutes.

Dip sugar cookie dough balls into melted candy melts:  
Holding onto the stick, cookie dough ball upside down,  dip each pop into bowl of melted candy melts and lightly spin, to coat the entire ball with candy melts.  Hold cookie dough pop upside down and let excess candy melt drip off. Stick the bottom of the cookie dough pop onto parchment paper so it can sit flat on a pretty platter.  While the candy melts are still wet, sprinkle with rainbow heart sprinkles or your desired sprinkle of choice. 

♥ 

Labels: , , , , , , , , , , , , , , , ,

Monday, July 29, 2013

Root Beer Float Cupcakes ♥ Dedicated to Grandmas Everywhere.

One of my favorite memories from my childhood was with my grandparents.
I'd ride four hours in the backseat of my parents' minivan to visit my grandparents' lake house in Northern Wisconsin for a weekend.  Four hours of travel time is a long time for an 8 year old girl, especially sitting next to my naughty teasing brother in the backseat.

But you know what made those four hours worth it?
My grandma, cheering me on when I arrived.
Hugging me, telling me how pretty I was becoming.
And after a long ride, she'd serve my brother and I a Root Beer Float in a tall glass.

Over 20 years later..
I made Root Beer Float Cupcakes:
Of course I used real A&W Root Beer in the batter.
I swirled the buttercream frosting on so it looked like the foam that "floats" on top of a Root Beer Float. (This frosting look achieved with a piping bag and a 1A Round Tip!)


Last week my friend Hillary who volunteers at New Curative (an assisted living Home in Green Bay) asked me to teach a cupcake class to her friends there. ♥  I could make any cupcakes I wanted with the residents!  So I thought of my grandma's Root Beer Floats right away.
The experience teaching the ladies (who are also all grandmas) to turn Root Beer Floats into cupcakes sent me on a trip down memory lane.

 My grandma should have been one of those fairy godmothers in a fairy tale book.  Her favorite thing to do was to feed me.  She had never ending buckets of ice cream in her freezer. It was like she could wave a magic wand and anything I wanted to snack on would be there.  I watched her scoop the ice cream into a tall glass, and as she poured the Root Beer over the top of the ice cream, the whole inside of the glass popped, bubbled, and fizzed.♥ My little hands wrapped around the thick glass.  The Root Beer Float was mine now, and I didn't mind my fizzy bubble mustache at all.  

I showed all of the grandmas how to scoop the buttercream frosting so it looked just like ice cream on top of a root beer float!  (Inspired by my grandma)  Yes, all of that is frosting.  Nostalgia + Lots of Frosting=LOVE


I even came equipped with a delivery of Chef Hats made by my friend "Grandma Lala" (another fabulous grandma).


And we each wrote our name in chocolate on top of our Root Beer Float Cupcakes:
I think that this may have made my grandma proud. (She's in Heaven cheering for me on her own cloud of frosting I am sure, but I'd like to think she visits me once in awhile and approves that I've taken on her role of feeding people now).

  Now it's my house that is filled with endless buckets of frosting and edible glitter.   Just writing this blog makes me realize that perhaps some of my experiences with my grandma is where my love for magical baking began! 

And what you are seeing in front of my tiffany blue glitter wall at my Cupcake Mansion are Root Beer Float Cake Pops ♥  Recipe for both the cupcakes and cake pops....are below!


Recipe for Root Beer Float Cupcake Nostalgia:
Makes 12 Cupcakes.

Ingredients:
  • 1 Cup A&W Root Beer
  • 1 teaspoon Apple Cider Vinegar
  • 3/4 Cup Fine Baking Sugar
  • 1/3 Cup Canola Oil
  • 1/2 teaspoon Vanilla Extract
  • 2 1/4 teaspoon Root Beer Concentrate (this may make the colors of your cupcakes light or dark depending on the brand used).
  • 1 1/3 Cups All Purpose Flour
  • 3/4 teaspoon Baking Soda
  • 1/2 teaspoon Baking Powder
  • 1 Tablespoon Ground Ginger
  • 1/4 Teaspoon Salt


Method:
1.  Preheat Oven to 325 and line your cupcake pan with 12 paper liners.
2.  In stand mixer bowl, combine root beer & apple cider vinegar.  Let this stand and "fizz" for a few minutes.
3.  After your mixture has "fizzed" for a little while, whisk sugar and oil in until mixture is frothy like a real root beer float.  
4.  Whisk in vanilla extract & root beer concentrate until combined.
5.  In a medium bowl on the side, mix your dry ingredients together:  Baking Soda, Baking Powder, Ground Ginger, and Salt.  
6.  Whisk dry ingredients into your stand mixer mixture until creamy. Scrape down bowl to make sure all ingredients are mixed together evenly.
7.  Fill cupcake liners 3/4 full and bake at 325 for 15-25 minutes, or until toothpick inserted into the center of cupcakes comes out clean.

The Frosting ♥
13 oz Marshmallow Cream
1 Lb of Unsalted Butter
5 Tablespoons Dry White Cake Mix (this gives your frosting a vanilla flavor that combines well with the root beer flavor!)
1 Tsp Vanilla Extract
6-8 Cups of Powdered Sugar 

Optional: 2-3 Tablespoons of Heavy Whipping Cream
For decorating: Paper Straws, Americolor Food Gel (if you want to color your frosting, Ice Cream Scoop, or 1A Round Decorating Tip)
1.  Using the paddle attachment, whip Marshmallow Cream and Butter together (both at room temperature) in a stand mixer.  
2.  Next add White Cake Mix and Vanilla Extract.
3.  Gradually add Powdered Sugar until frosting is the thickness desired. (Less Powdered Sugar=light and dreamy fluffy frosting, good for swirling.  More Powdered Sugar=thick stiff frosting good for scooping to look like ice cream)

Tip:   If you add too much powdered sugar and want a fluffy, lighter frosting.you  use the heavy whipping cream in your frosting recipe.

If you want to make root beer float cake pops: Crumble up your cupcakes in a medium bowl, mix with 2 Tablespoons of Frosting until consistency is like play-dough, and roll into 1 1/2" cake balls.  Refrigerate cake balls on a parchment paper lined baking pan until cake pops are firm enough to dip into white chocolate.

Labels: , , , , , , , , , , , ,

Thursday, December 20, 2012

Fantastical Winter Wonderland Cake Pop Tutorial ♥

People always ask me who my inspiration has been in creating my cupcakes.  I have several.  I'll reveal a few inspirations today.

One is the little me. (The little Amanda before she became Amanda Cupcake). Because she is unshaped by the rest of the world.  She lives her life through her imagination, and when she grows up she believes she can be any one, wear any colors together (they don't have to match), and she has a really big heart for all people, animals, and life. I try to keep her around.

Another is Dr. Seuss. He speaks to the little me. And to the big me at the same time. He probably does that for you too.  He is my kindred spirit. Whenever I read his books, even now as a 33 year old woman I am reminded that he is my role model. In fact, I believe he is the perfect guru. ♥


Inspired by life being whimsical, fantastical, colorful, and wise all at the same time, (a Dr Seuss - esque life) I bring you.. 

Winter Wonderland Cake Pops. A Tutorial.
Made by hand at my Cupcake Mansion in New London, WI ♥ 
(And yes, that's a unicorn painted on the window, inspired by the little me..and the little you)!

Yes, they are edible.
Hotttt Pink
Christmas Green
Wonderland White
(those are my own Amanda-made color names but I really "decked the halls" with White Candy Melts, Chefmaster Candy Colors in Green & Pink, and Neon Candy Stars).

♥ Make time to have fun and be patient!  Find a friend, or a son, daughter, mom, dad, grandma, grandpa, etc to make these with  ♥ 
♥ Bake a cake and turn it into a play-dough-esque cake pop blend (see recipe for cake pops below). 
♥ The best way to describe how to make these "trees" is to think of molding your cake pop blend into a small cone shape.   
♥Once you've made your tree shape, you will refrigerate the little tree shapes for appx 30 minutes to an hour so they are firm enough to dip into candy melts. 
 ♥ While your trees are in the refrigerator, melt your candy melts in the microwave in 15-30 second increments.  (If you over microwave your candy melts they will burn and be too lumpy for dipping)
♥ Dip your cake pop sticks in the melted candy and immediately insert the wet side of the stick into the bottom of the cake pop tree (as shown above).  
♥ Let the sticks dry in the cake pop trees for a few minutes.

Now you can start dipping your trees in your deep dreamy pools of melted colorful candy melts. (wouldn't it be amazing to have big buckets of this available at all times?!?!)

Every tree must be topped with a Neon Star! ♥

Quick! Before the candy melts dry, turn your cake pops right side up and stick in a cake pop stand or floral foam.  Top your wonderland trees (by hand) with edible glitter, disco dust, and neon stars! Right now, they already look like trees, and they are pretty so you could just leave them like this...

Or you could add drippy snow (and this part is fun because you don't necessarily have to have a steady hand. Snow and ice are supposed to drip..just like candy melts).

I pour white melted candy melts into a ziploc bag, cut a small hole in the bottom corner and start piping snow onto each little tree. This is when everything starts to look really really magical. (Excuse my frosting dyed hands above.  My hands truly do tell the wonderful story of my life!I'm not in L.A. anymore. Ah the days of perfect manicures that lasted at least a week!)

These remind me of the Abominable Snowman from Rudolph. My friend said they remind her of Rainbow Brite & her Sprite ♥ Both bring me back to the little me. You should have seen how I made these. Like a true artist: I "threw" sugar crystals and sprinkles at them while the candy melts were still somewhat wet! 

You have now created a village of Winter Wonderland Trees!

My favorite disco dust colors for trees: Avocado Green, Rainbow, and Hologram Silver. These don't have to be for Christmas, you can make them for a blustery wintery snow day too.

Cake Pop Recipe:
I make cake pops from from scratch, because the cake is more dense and holds its shape when you mold it.
This is an awesome recipe to use - I have adapted Magnolia Bakery's red velvet recipe (I added a little something that gives it an Amanda touch). It makes the yummiest cake pops:

3 1/3 Cups Cake Flour
3/4 Cup Unsalted Butter, Softened
2 1/4 Cups Extra Fine Baking Sugar
3 Large Eggs (preferably at room temp)
6 Tablespoons of Super Red Americolor Gel Paste
3 Tablespoons Unsweetened Cocoa
1 1/2 teaspoons Vanilla Extract
1 teaspoon Almond Extract
1 1/2 teaspoons salt
1 1/2 Cups Buttermilk
1 1/2 teaspoons of cider vinegar
1 1/2 teaspoons of baking soda

Instructions for making the cake from scratch and turning it into cake pops:
1. Sift cake flour in a small bowl and set aside.
2. In a stand mixer, cream butter, eggs, and sugar together.
3. In another small bowl, combine cocoa, vanilla extract, almond extract and red color together.
4. Pour Buttermilk into a 2 Cup glass measuring cup, and dissolve 1 1/2 teaspoons salt into the buttermilk.
5. Now alternately add the dry and liquid ingredients to the creamed mixture until well blended.
6. Last but not least, a magical little ingredient blend: in a small bowl, mix the cider vinegar and baking soda. It will fizz. That's why I call it magical.
7.  Add the magical blend of baking soda and cider vinegar to your cake batter and blend well with your mixer.
8.  To make cake pops:  Bake the cake mix in a 9x13 pan or in cupcake liners. 
9.  Once cake is done baking, crumble up your cake mix into your mixing bowl.
10.  Let the crumbled cake mixture completely cool.
11. Once cooled, add 2-3 Tablespoons of frosting at a time to the crumbled cake mix using your clean hands or a large metal spoon. 
12.  Then roll by hand into desired shape onto a cookie sheet lined with parchment paper.
13.  Cover your cookie sheet with saran wrap and place the cake pops in the refrigerator for hours (or until the cake is firm enough so that it won't fall off of the stick when you dip the cake pops).

TIP:  When dipping cake pops, make sure you melt candy melts into a deep enough bowl so that your cake pop doesn't smash against the bottom of the bowl.

Basic Buttercream Frosting Recipe:
(I even used it on some Green "Grinch" inspired cupcakes ,but you can also use it to mix with your cake pops (green color was Electric Green from Americolor)♥

1 Cup Butter, softened
1 1/2 tsp Vanilla Extract
2-3 Cups Powdered Sugar
1-2 tsp of Heavy Whipping Cream (if you want a creamier frosting)

Directions:
Cream the butter and vanilla in a stand mixer until fluffy. Gradually add powdered sugar to your creamed mixture. If frosting is too stiff, or if you want it to be creamier you can also add Heavy Whipping Cream

Labels: , , , , , , , , , , ,

Tuesday, September 4, 2012

Someday..you will be old enough to start reading fairy tales again ♥

I went to my first Renaissance Fair last weekend.
And it was even better than the first time I went to Disneyland!
Dressing up in costume always brings me back to the fearless, real me ♥ The side of me who gets to be what she always dreamed of.  And this last weekend, it was a fairy princess! 
 
Which reminded me of an amazingly sweet princess who glitterized my heart this summer.
Princess Kianna. ♥
I tried my best to tell her fairy tale on a cake.
 
I agreed to meet with Kianna in person over a lunch date one day, and I asked her what she'd like on her cake.
 
Her request..
Magic Wands. ♥
 
Pink & Purple Cake Layers!
 
Sparkles, princesses, and crowns!
 
I added ruffles to the cake to match the birthday princess's purple tutu ♥.
 
..and made princess doll cake pops to match!
I printed the princess paper dolls from Activity Village, cut out the crowns separately and glued them to each princess paper doll. ♥
 
The princess skirts were the cake pops!  (I've made these before using Barbie as the icon, and you can click on the link here for the tutorial on how to make your own paper doll pops!)
 
The magic wands were birthday candles with a fondant star on top!  I used a star fondant cutter to cut out fondant stars.   My "fairy godmother" touch:  I warmed up candy melts in the microwave. The candy melts were my edible glue to turn a basic birthday candle..into a glittery starry magic wand!♥
 
How did I come up with all of this on one cake? It was imagination more than magic. I channeled my inner "supercalifragilisticexpialidocious".Most importantly, my inner Princess Kianna! 

....Because a princess Kianna exists in all of us, even when we are "all grown up."
 
 
♥Honored to be Kianna's fairy godmother for a day!
 
I couldn't resist, I saved the text her mom sent me.
Yes, princess Kianna, you have glitterized my heart! ♥
 
..or if you're around me..maybe eating them? ♥

Labels: , , , , , , , , , , , , , , ,

Wednesday, August 29, 2012

My Summer of Love......

I never would have guessed that this would be my "Summer of Love".

In the beginning of the summer, I was facing a pretty harsh breakup. One of my status updates on my personal Facebook back in May said something like, "I need someone to glitterize my heart." Sadface.

Red Velvet Cupcake Hug for me?! :(
(I made this for a friend, but I totally could have used one myself!)
 
Well ladies and gents, you better be careful what you wish for.
My heart was glitterized this summer.
Maybe not by my own summer fling or a rebound romance..
Instead my cupcake heart was invited to attend a wedding as a cupcake caterer almost every weekend this summer!

(I was even in my friend's wedding. I'm one of these ladies here and it's pretty easy to tell which one I am. Look for the glittery heart).
(awesome California photographer btw: Stark Love Photography)

♥

Gradually..with each sweet wedding tale... my heart began to patch itself up.  It's almost September now, and I feel vibrant, alive, and glittery again.  Like my heart never lost it's sparkle. (hmm just in time for some Hologram Gold Fall sparkly-ness, perhaps)?

Thank you to each unique wedding I attended. I have witnessed how much love is out there in the world. It seems there is quite possibly enough love out there left for me ♥.

This blog entry and my next few blogs are going to be dedicated to the couples of my summer that glitterized my heart again.

So I want to say a thank you to...
Sarah and Joey
for sprinkling my heart with their sparkles.

(photos of Joey/Sarah courtesy of DanWoolf photographer extraordinaire)
 
 
My description of these two: Fun, Young, Insanely Sweet. When I had my first consult with them I thought.."Wow, these two are so lucky that they have found a best friend in each other."  It's just the vibe that I got from them, and I don't think my instincts were wrong ♥.
  
Joey and Sarah were married at *the* Lambeau Field in June.♥
 
This was my entrance to Lambeau Field. I had to load the wedding cake and cupcakes here to cart it up into a top secret elevator.  I felt like a cupcake spy. ♥ The security guard guy even gave me a tour of the stadium VIP status!
 
The Lime Green, Pink and Navy Blue Three Tier Wedding Cake made it safely. Phew. 
 
I love that the bride & groom requested Funfetti as the flavor of their wedding cake.  I thought adding giant, oversized tissue paper flowers would be way more "fun" and celebratory than the typical fondant perfection wedding flowers ♥.


Cupcakes to match the cake ♥
(Americolor Gel Colors: Electric Blue, Electric Pink, Electric Green)
 
Flavor: Cocktail Cupcakes (Lime Margarita).
 
Wedded Bliss In a Cupcake ♥.
A quote from my instagram, "Reminds me of the cosmos."
 
Sarah's request: Multi-colored swirls of Frosting that make the cupcakes look like they jumped out of a Dr. Seuss book!
 
Sparkly Blueberry Velvet Cake Pops.  The flavor even matches their wedding colors!
 
Joey's fave:  Banana Chocolate Peanut Butter ♥
 
What bride doesn't love a pink sparkly cake pop?  I wonder if Sarah and Joey exchanged sparkles in their kisses ♥
 
I bet some of the cupcake sparkles and/or crumbs I delivered for Joey & Sarah are still lingering in the Lambeau Field breeze. :)  Hooray for touchdowns. ♥
 
Joey and Sarah..this is the glitter you left lingering on my heart---a quote by Julia Child:


Labels: , , , , , , , , , , , , , , , , , ,

<data:blog.pageTitle/>

This Page

has moved to a new address:

https://theamandacupcake.com

Sorry for the inconvenience…

Redirection provided by Blogger to WordPress Migration Service