Friday, December 12, 2014

How to throw a Cupcake Party fit for a Snow Queen ♥

People always ask me...
"Why do you share your baking tips with others?"
Because I love to teach, and I believe everyone has their own style when it comes to baking and decorating cupcakes.  Every cupcake is an original.  I haven't always been a Cupcake Queen. I was a Cupcake Student at one time too! Some of my favorite online bakers that I learned the most from are I am Baker and Bakerella.  Because I've learned from others, I pass on the knowledge. Pay it forward ♥


This early winter, I taught two cupcake classes at the Royal Palace, Givens Farm in Hortonville, Wisconsin ♥ The theme:  By popular request..Disney's movie "Frozen".  The ambiance was perfect.  Glittery snowflakes were falling both nights I taught classes.

I even wore glittery eye make up and a braid to look like Snow Queen Elsa.


Have you seen the movie yet? I enjoyed watching Frozen because while it channeled my love for classic Disney Princess nostalgia for the first time in a long time (think Sleeping Beauty, Snow White), Frozen empowered Disney princesses in a very different way than any other Disney princess movie has!  
♥
Plus..there is this snowman named Olaf who makes the movie worth watching.  Snow Queen Elsa creates him with her snow queen magic.  It is the first time since Frosty the Snowman that I have wished for a snowman as a best friend.  Olaf is the kind of fun snowman friend that would take a sunny tropical vacation with you. You have to watch the movie to understand!
 I shared some of my Cupcake Queen magic with the class, and we all created our own Olafs.  His huge smile made all of us smile.

His nose was made out of Cheddar Bugles.  They look just like carrots!  Using a clean pair of scissors, we cut them down to fit the size of his sweet cupcake face.

On a pan lined with parchment paper, we poured melted chocolate candy melts into a disposable piping bag or ziploc bag and cut a tiny hole at the end of each baggy.  We piped out the little "branches" for the top of his head onto the parchment paper.  We used the same technique to make the big smiles. While the chocolate "smiles" were still wet on the parchment paper, I centered a piece of Trident gum on each chocolate smile for Olaf's tooth.  Candy melts dry really fast, but I like to "set" all of my pieces in the refrigerator when I am done piping because all the little pieces of handiwork are very fragile and they tend to break if too warm.  The colder the little chocolate pieces are before you handle them, the harder they are and the less likely they are to break apart or melt.

Since I am super detail oriented, I piped Olaf's famous eyebrows on his little edible sugar eyes using the melted dark chocolate candy melts (you can find the sugar eyes at local cake decorating stores).   
Look at how many Olafs I had in the kitchen with me when I was practicing for my class!   Every Olaf will look different, but I think that's what makes your hand-crafted Olaf cupcake charming.

♥

When throwing cupcake party classes, I love using these little painters palettes to put the sprinkles and edible gems in!  You can place your cupcake in the center of the palette as the centerpiece. Some of my favorite sprinkles for a Frozen Cupcake class:  Mini Snowflake Sprinkles, Edible Pearls, Chocolate Covered Blueberries, Disco Dust, Hot Pink Nonpareils, and Lavender Sixlets that look like giant pearls.


As a class we made handmade "Frozen" hearts and princess names by piping them freehand onto parchment paper.  (Hint:  If you're not great at freehanding, you can find any shape clipart you desire on the internet.  Parchment paper works awesome as tracing paper.  You just print the clip art out on a piece of paper, place under the parchment paper, and trace over the art onto the parchment paper with your candy melts).

Elsa, Anna, and Olaf. 


Remember those princess dress cakes from your childhood?  We recreated those princess dress cakes as cupcakes!  ♥  All you have to do is find your favorite picture of your favorite princess..and glue the paper doll to a toothpick.  Once you have frosted your cupcake to look like a puffy ruffly princess skirt, you can insert the paper doll.


The perfect flavor for a Frozen themed cupcake class?
 Blueberry Velvet cupcakes.
Rich, Royal and "Iced" for a Snow Queen.
Recipe for Blueberry Velvet Cupcakes here.
Recipe for Fantasy Rainbow Frosting Swirls and Buttercream Frosting here.

The lavender colored cupcakes remind me of Anna more than Elsa. I used a dot of Americolor Regal Purple Color Gel Paste in white buttercream to achieve this color!

I love using oversized chocolate covered blueberries on top of the cupcakes. Edible gems!

Student Art! Pretty amazing!


Last but not least....
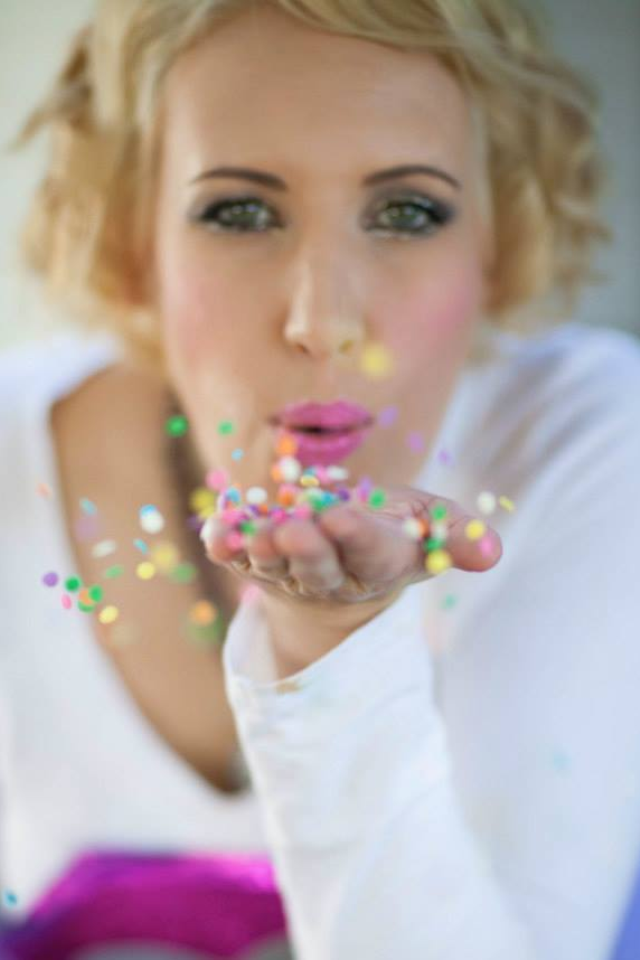
(She who leaves a trail of glitter is never forgotten)...
Each student received a capsule of non-edible glitter as a gift (and a warm hug) from me!  At the end of class, we each opened a capsule of glitter and threw a fistful of glitter into the wind/snow.  If that won't make you feel like a Snow Queen, I don't know what will.  I told the students to feel free to make a wish as they were throwing the glitter.  (I found the glitter in cute little capsules like this at the dollar store-nail art actually, but perfect for this occasion).
♥

Labels: , , , , , , , , , , , , ,

Thursday, December 20, 2012

Fantastical Winter Wonderland Cake Pop Tutorial ♥

People always ask me who my inspiration has been in creating my cupcakes.  I have several.  I'll reveal a few inspirations today.

One is the little me. (The little Amanda before she became Amanda Cupcake). Because she is unshaped by the rest of the world.  She lives her life through her imagination, and when she grows up she believes she can be any one, wear any colors together (they don't have to match), and she has a really big heart for all people, animals, and life. I try to keep her around.

Another is Dr. Seuss. He speaks to the little me. And to the big me at the same time. He probably does that for you too.  He is my kindred spirit. Whenever I read his books, even now as a 33 year old woman I am reminded that he is my role model. In fact, I believe he is the perfect guru. ♥


Inspired by life being whimsical, fantastical, colorful, and wise all at the same time, (a Dr Seuss - esque life) I bring you.. 

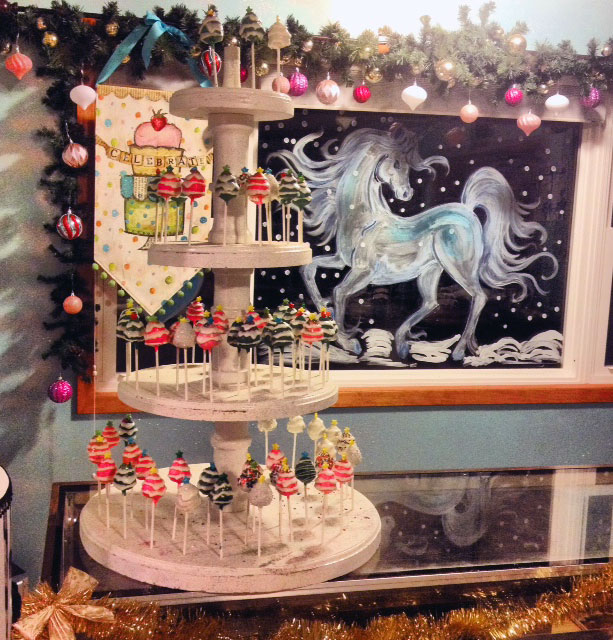
Winter Wonderland Cake Pops. A Tutorial.
Made by hand at my Cupcake Mansion in New London, WI ♥ 
(And yes, that's a unicorn painted on the window, inspired by the little me..and the little you)!

Yes, they are edible.
Hotttt Pink
Christmas Green
Wonderland White
(those are my own Amanda-made color names but I really "decked the halls" with White Candy Melts, Chefmaster Candy Colors in Green & Pink, and Neon Candy Stars).

♥ Make time to have fun and be patient!  Find a friend, or a son, daughter, mom, dad, grandma, grandpa, etc to make these with  ♥ 
♥ Bake a cake and turn it into a play-dough-esque cake pop blend (see recipe for cake pops below). 
♥ The best way to describe how to make these "trees" is to think of molding your cake pop blend into a small cone shape.   
♥Once you've made your tree shape, you will refrigerate the little tree shapes for appx 30 minutes to an hour so they are firm enough to dip into candy melts. 
 ♥ While your trees are in the refrigerator, melt your candy melts in the microwave in 15-30 second increments.  (If you over microwave your candy melts they will burn and be too lumpy for dipping)
♥ Dip your cake pop sticks in the melted candy and immediately insert the wet side of the stick into the bottom of the cake pop tree (as shown above).  
♥ Let the sticks dry in the cake pop trees for a few minutes.

Now you can start dipping your trees in your deep dreamy pools of melted colorful candy melts. (wouldn't it be amazing to have big buckets of this available at all times?!?!)

Every tree must be topped with a Neon Star! ♥

Quick! Before the candy melts dry, turn your cake pops right side up and stick in a cake pop stand or floral foam.  Top your wonderland trees (by hand) with edible glitter, disco dust, and neon stars! Right now, they already look like trees, and they are pretty so you could just leave them like this...

Or you could add drippy snow (and this part is fun because you don't necessarily have to have a steady hand. Snow and ice are supposed to drip..just like candy melts).

I pour white melted candy melts into a ziploc bag, cut a small hole in the bottom corner and start piping snow onto each little tree. This is when everything starts to look really really magical. (Excuse my frosting dyed hands above.  My hands truly do tell the wonderful story of my life!I'm not in L.A. anymore. Ah the days of perfect manicures that lasted at least a week!)

These remind me of the Abominable Snowman from Rudolph. My friend said they remind her of Rainbow Brite & her Sprite ♥ Both bring me back to the little me. You should have seen how I made these. Like a true artist: I "threw" sugar crystals and sprinkles at them while the candy melts were still somewhat wet! 

You have now created a village of Winter Wonderland Trees!

My favorite disco dust colors for trees: Avocado Green, Rainbow, and Hologram Silver. These don't have to be for Christmas, you can make them for a blustery wintery snow day too.
♥

Cake Pop Recipe:
I make cake pops from from scratch, because the cake is more dense and holds its shape when you mold it.
This is an awesome recipe to use - I have adapted Magnolia Bakery's red velvet recipe (I added a little something that gives it an Amanda touch). It makes the yummiest cake pops:

3 1/3 Cups Cake Flour
3/4 Cup Unsalted Butter, Softened
2 1/4 Cups Extra Fine Baking Sugar
3 Large Eggs (preferably at room temp)
6 Tablespoons of Super Red Americolor Gel Paste
3 Tablespoons Unsweetened Cocoa
1 1/2 teaspoons Vanilla Extract
1 teaspoon Almond Extract
1 1/2 teaspoons salt
1 1/2 Cups Buttermilk
1 1/2 teaspoons of cider vinegar
1 1/2 teaspoons of baking soda

Instructions for making the cake from scratch and turning it into cake pops:
1. Sift cake flour in a small bowl and set aside.
2. In a stand mixer, cream butter, eggs, and sugar together.
3. In another small bowl, combine cocoa, vanilla extract, almond extract and red color together.
4. Pour Buttermilk into a 2 Cup glass measuring cup, and dissolve 1 1/2 teaspoons salt into the buttermilk.
5. Now alternately add the dry and liquid ingredients to the creamed mixture until well blended.
6. Last but not least, a magical little ingredient blend: in a small bowl, mix the cider vinegar and baking soda. It will fizz. That's why I call it magical.
7.  Add the magical blend of baking soda and cider vinegar to your cake batter and blend well with your mixer.
8.  To make cake pops:  Bake the cake mix in a 9x13 pan or in cupcake liners. 
9.  Once cake is done baking, crumble up your cake mix into your mixing bowl.
10.  Let the crumbled cake mixture completely cool.
11. Once cooled, add 2-3 Tablespoons of frosting at a time to the crumbled cake mix using your clean hands or a large metal spoon. 
12.  Then roll by hand into desired shape onto a cookie sheet lined with parchment paper.
13.  Cover your cookie sheet with saran wrap and place the cake pops in the refrigerator for hours (or until the cake is firm enough so that it won't fall off of the stick when you dip the cake pops).

TIP:  When dipping cake pops, make sure you melt candy melts into a deep enough bowl so that your cake pop doesn't smash against the bottom of the bowl.

Basic Buttercream Frosting Recipe:
(I even used it on some Green "Grinch" inspired cupcakes ,but you can also use it to mix with your cake pops (green color was Electric Green from Americolor)♥

1 Cup Butter, softened
1 1/2 tsp Vanilla Extract
2-3 Cups Powdered Sugar
1-2 tsp of Heavy Whipping Cream (if you want a creamier frosting)

Directions:
Cream the butter and vanilla in a stand mixer until fluffy. Gradually add powdered sugar to your creamed mixture. If frosting is too stiff, or if you want it to be creamier you can also add Heavy Whipping Cream ♥

Labels: , , , , , , , , , , ,

Saturday, December 17, 2011

Orange Dreamsicle Cupcakes In the Winter!

Waking up on a winter morning wrapped up in my snuggie, looking out the window at a fresh snowfall is kind of like comfort food. And when the sun goes down, the sparkles in the snow become twinkly stars.


If I lived in an edible winter wonderland, the snow would be fluffy and creamy and sugary. Like a dream.


Orange and White Winter Dreamsicle Cupcakes.
♥


I used an extra large #9 Open Star Tip to swirl frosting dreams come true.
The tip looks like this and you can buy it at Ateco:


I used a basic buttercream frosting recipe, and added a splash of orange extract. See recipe below.
My favorite brand of icing color (especially their "electric" line of colors!):  Americolor.


Picking up the cupcake with a stick and eating it like an orange dreamsicle in the winter is an indulgent fantasy, truly.  I used mini "Woodsies" popsicle sticks as cupcake toppers. You can buy them at Hobby Lobby.


little dreams ready for delivery.


Simple Recipe for your very own Orange Dreamsicle Cupcakes:
(Makes approximately 24 cupcakes!)

Ingredients needed:
1 box of white cake mix
3 oz package of Orange Jello Mix
3 or 4 oz package of Cheesecake pudding mix
1 1/4 Cup Orange Juice
4 Eggs
1/3 C Vegetable Oil
1 tsp Vanilla
1 tsp Orange Extract
Optional (and I like adding this..):  1 tsp of Orange Zest

Instructions:
1.  Preheat oven to 350.
2.  Line your cupcake pan with 24 cupcake liners.
3.  In a bowl or a stand mixer, whip all of your ingredients together for approximately 2 minutes.
4.  Once ingredients are blended, use an ice cream scoop to fill your cupcake liners with batter-approximately 2/3 full.
5.  Bake for approximately 20 minutes or until a toothpick inserted in the center comes out clean.


The delicious frosting:

8 oz Cream Cheese
1 Cup Unsalted Buter
1 Tablespoon of Milk or Heavy Whipped Cream
1 Teaspoon of Orange Extract
2 tsp of Orange Jello Powder
appx 6-8 Cups of Confectioners Sugar

Optional:
  • Combine 4 oz of cream cheese with your butter & milk
  • Add 1 Tablespoon of Orange Zest to the frosting blend.
  • Sample your frosting with a popsicle stick ♥ I really recommend this!

Instructions:
1. In your Mixer, Blend Butter and Milk until creamy and dreamy.
2. Add Orange Extract and Jello Powder to the whipped goodness.
3. Gradually add Confectioners Sugar.  This is where you decide how much you want to add. The more sugar you add, the thicker the texture of the frosting.
I add about 3 cups of this to achieve a dreamy swirl of frosting. You can always add more milk to make the frosting creamier.


♥ 

Labels: , , , , , , , , ,

<data:blog.pageTitle/>

This Page

has moved to a new address:

https://theamandacupcake.com

Sorry for the inconvenience…

Redirection provided by Blogger to WordPress Migration Service